Content
This brief guide will introduce you with common Decision Deck use cases.
This brief guide will introduce you with common Decision Deck use cases.
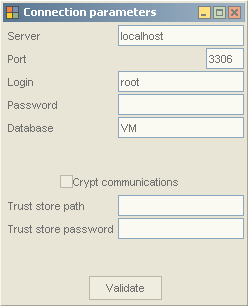
After startup, the interface is almost empty: a synthetic menu bar is all there is. To begin working, user must first specify the datasource connection information. The “File/Connection Parameters” menu item brings up a dialog (Fig. 1) where host name, database name, user name, password and port of the target database can be specified:
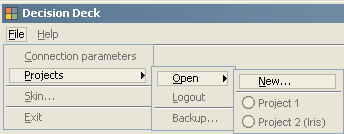
Once specified, available project list is populated (Fig. 2). Picking one item opens the corresponding project.
Three hard-coded roles have been identified:
- Coordinator: The Coordinator has the reponsability to specify the model.
- Decision Maker: The Decision Maker has the responsibility to choosing an alternative.
- Evaluator: The evaluator has the responsibility to evaluate alternatives
When opening a project, the user is asked for its login and password. Login and password are specific to a given project. If the user has multiple roles then he’s asked to choose the one he wants to log in under.
The interface adapts to the current user role. The coordinator interface exposes some additional functionalities:
- The coordinator can create, delete and modify a project
- The coordinator can send mails to evaluators
Project creation and deletion are subject to some restrictions. At install time a org_decisicion_deck database has been created. Its sole purpose is to allow authenticating “power users”.
A project can be created through the “File/Projects/New” menu item. When trying to create a project, user is authenticated against the org_decision_deck.User table. By default a power user such as :
- login=d2
- password=d2
is created. Project deletion is not subject to the same restrictions. However only a coordinator can delete a project.
At project creation time, user is asked to choose the plugins to enable for the project (Fig. 3).

The plugins list can be modified after project creation (“File/Projects/Plugins” menu item). However please note than the list can only be broaden. Plugin removal is not supported as of today.
A default coordinator is created in the new project:
- login=cd
- password=p
Once the project is created, the coordinator can begin specifying the problem:
- Specify the users (evaluators, additional coordinators, deciders) (see screenshot)
- What are the alternatives we want to evaluate ? (see screenshot)
- What are the criteria against which the alternatives are evaluated? (see screenshot)
Then he sends email notification to all registered evaluators (“Tools/Send Mails” Menu Item). note that mail paramaters must have been configured prior to that.
The Evaluations screen (see screenshot) allows evaluators to enter their evaluations. Evaluations are presented as a pivot table x axis represents the criteria, y axis represents the alternatives.
This screen is read-only for coordinators and decision makers. Depending on the criteria configuration, evaluator might also need to enter criteria bounds.
Under coordinator role, if (and only if there are multiple evaluators), user can switch between evaluator evaluations thanks to the Combo located above the evlauation grid.
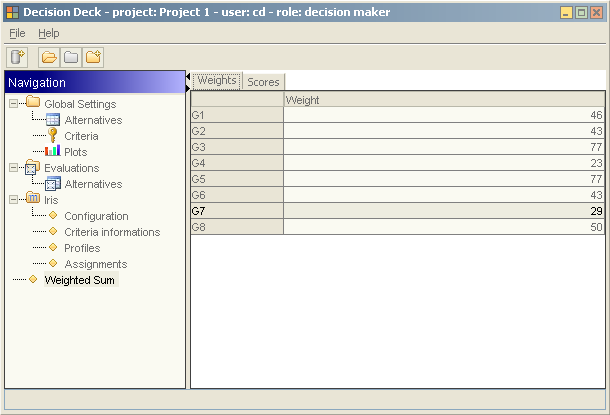
As of today plugins can only contribute to the interface through the navigation menu and the toolbar. For instance, the Weighted Sum plugin that comes with the platform adds a new “Weighted Sum” navigation node.
It presents a two page panel:
- on the first page, the coordinator specifies additional parameters used by the plugin (see parameters screenshot)
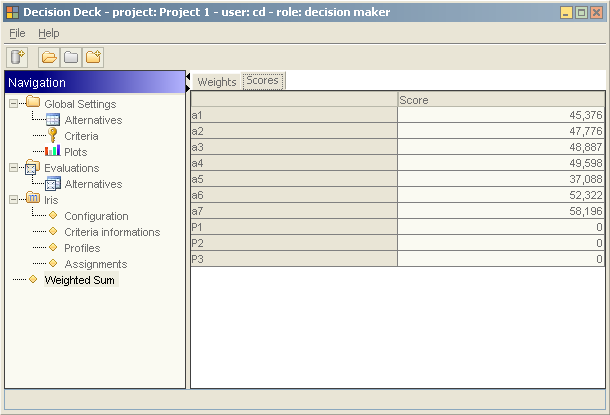
- on the second page, coordinator and decision maker can visualize the results (see results screenshot)